Have you ever wondered how some people grow their email lists to such explosive numbers? Maybe you just start collecting email addresses and are struggling to get people to sign up. Or you’ve had your list for a while, but it’s just not growing. What you need is an email opt-in yoga freebie.
But first up. Let’s rewind a moment if you’re still trying to get the first few people on your list. What you need is the 3 Day List Building Challenge and to make sure that you’re fully on board with why yoga teachers need an email list.
Once you’re convinced that building your email is a fantastic use of your time, join me back here as I share how to create the perfect opt-in yoga freebie that your ideal students will love in this post!
If you’re trying to grow your email list, email opt-in yoga freebies are the answer.
But not just any email opt-in yoga freebie. You need yours to be so irresistible that the visitors on your website will instantly type in their email address into your opt-in form (more on these later).
Quite simply, email opt-in yoga freebies are the single best way to entice new subscribers to join your yoga-focused email list.
So what is an opt-in freebie and why do you really need one?
What is an email opt-in yoga freebie?
It’s the one thing you absolutely NEED in order to grow your email list.
An opt-in freebie is a free piece of downloadable content that you give your reader in exchange for their email address.
The key is to find a topic that is relevant for your ideal student and strongly resonate with them. This is the best way to attract the right people on to your list.
Other names for opt-ins include: content upgrades, freebies, opt-in gifts, triggers, and lead magnets.
Here are a few common types of opt-in freebies:
- Template
- E-book
- Email course
- Mini online Course
- Workbook
- Worksheets
- Video tutorial
- PDF guides
- Checklist
- Cheats sheets
- Webinars
- Spreadsheet
- Free online consultations
- Discount code
Why not just a yoga newsletter?
One of the biggest mistakes that you can make is to simply create an opt-in form that says, “Sign up for my newsletter.”
You need to give something of value to your audience. And be more descriptive in what they are going to get in exchange for their email address. This is so vital because people want to know that they are spending their time on something that is valuable.
If you want to stand out in your yoga niche as a teacher who is knowledgeable about a specific topic, then creating a valuable opt-in freebie about that topic is going to show your ideal students that you’ve got a lot of knowledge to share. Your opt-in freebie will build your authority on the subject.
Those subscribers to your opt-in will consider your freebie a taster of your paid offerings such as an online home yoga course. You want them to say, “If this is how good the freebie is, then the paid course much be incredible.”
Make sure your freebie delivers so much value that your subscribers will want to buy into your paid products and services when you have them available.
STEP 1: DO YOUR RESEARCH!
Before you dive in, make sure you’re actually creating a piece of content that your ideal students want.
The best way to do this is to find out what topics your ideal students are interested in. You can start this process by asking yourself a few questions:
- What are my ideal students currently struggling with the most?
- What is one question that I’m frequently asked when teaching?
- How can I use my expertise and knowledge to help them?
If you’re still not sure, it’s time to do some market research.
You can strike up a conversation with some of your regular students after class and ask them what they are struggling with.
You could create a survey using SurveyMonkey and send it to your email list, share on your social media and post it in a yoga-specific Facebook group. People are always asking questions about what they’re struggling with the most.
Once you’ve generated a list of your ideal student’s problem areas, it’s time to choose one topic to focus on. Which problem best matches up with your expertise? In other words, which question are you most comfortable answering, or which problem are you most confident solving?
STEP 2: FIND A SOLUTION TO THEIR PROBLEM
Once you figure out what your ideal students are struggling with, provide a solution! But not just any solution–a simple, actionable, and fast solution that will provide RESULTS.
If your ideal students are just starting their yoga journey, a general yoga e-book or online yoga class will not resonate in the same way as a checklist for beginners which shares what to expect from your first yoga class.
So find something that really connects with your yoga niche and delivers value that finds a solution to their problem.
In a nutshell, your email opt-in yoga freebie should give a simple, quick solution and gain your readers’ trust.
If you can deliver this, you’ll make yourself more credible, and your subscribers will stick around for more.
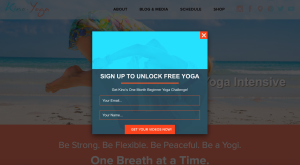
Kia Miller offers a freebie for students who are looking to gain more energy and radiance.
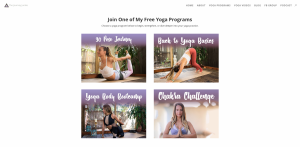
Allie from The Journey Junkie has created a number of free yoga programs for her audience that feed into her paid programs and courses.
STEP 3: CREATE YOUR FREEBIE
Now that you have a clear idea of what to include in your freebie, you need to choose a format to present your information that will make the most sense to your ideal students. And it should also be easy to digest.
Your freebie can come in SO many different formats; from checklists to workbooks to videos and more. The goal is to make sure that the CONTENT in your freebie is perfectly suited to the FORMAT.
If you’re sharing a long list of items to complete, you’ll want to create a checklist. People LOVE ticking things off a list! So for creating checklists, workbooks, PDFs, or anything visual, I like Canva.
For recording your screen in a video tutorial, I like using QuickTime (it comes standard on Mac computers).
For email challenges, you can set up a sequence using the automation features in MailChimp.
Now comes the extra-fun part: actually designing your freebie! Your design program will vary – obviously – depending on what type of freebie you’re creating.
Here are a few tips to keep in mind when creating your freebie:
- Incorporate your brand fonts and colours to increase recognition of your yoga brand
- Add your logo or domain name so people are reminded of where it came from
- Create social media graphics to promote your freebie at the same time
- Use your own photos or stock photos from sites like Creative Market, Shutterstock, and UnSplash.
- If design really isn’t your strong suit, I’d suggest either taking a course to improve your graphic design skills or hiring a professional to create some freebie templates for you.
You want your subscribers to be BLOWN AWAY by how amazing your freebies look. So they know it’s a sign of great things to come!
Then it’s time to come up with a fun name! You want your title to be catchy, intriguing, and memorable, while still being simple enough for people to remember.
Once your freebie is looking fresh and is ready to go, it’s time to set up the automated delivery!
STEP 4. DELIVER YOUR FREEBIE
Once you’ve created your freebie, you’re going to need a way for people to sign-up to receive your freebie. This is where opt-in forms come in.
You can have multiple opt-in forms across your website, not just the one.
Your opt-in forms should be prominent and easy to spot such as on the top section of your homepage.
MailChimp makes this super easy to add forms to your site in the headers, footers and sidebars and within the page content itself.
If you use ConvertKit, they provide simple opt-in forms that you can embed right into your blog post or main page. You can also create a landing page that features just the opt-in, making it less distracting for potential subscribers.
With your opt-in forms set up and visible across your website, you then need to set up how your freebie will actually be delivered to your new subscriber. There are a few ways to do this.
You can set it up to send as an attachment with the “Welcome” email your new subscriber receives. Or you can create a password-protected Resource Library to house all of your freebies, and send the password to new subscribers in a welcome email.
Although the process of delivery will vary between email service provider platforms, most platforms will have a relatively easy way to deliver your freebie to new subscribers.
STEP 5: PROMOTE YOUR FREEBIE
Next, you want to create a promotional graphic for your freebie.
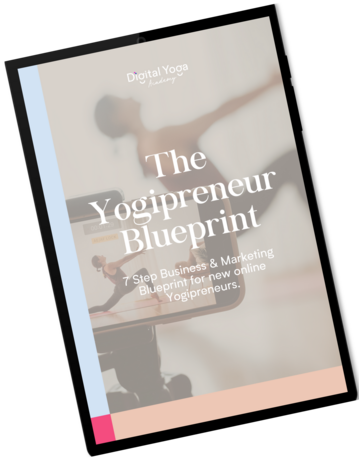
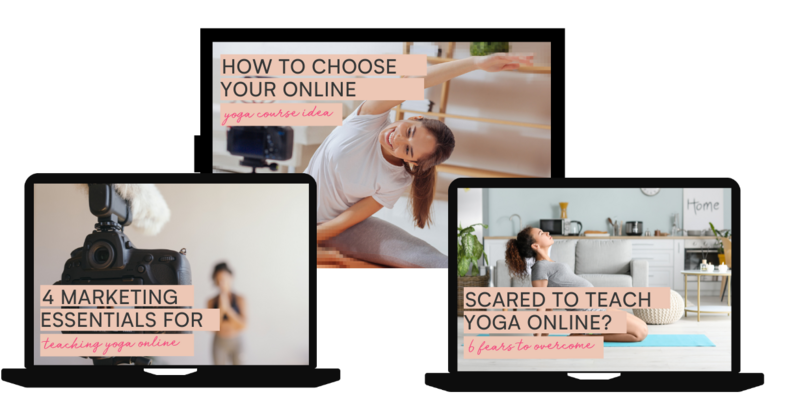
The best way to do this is to use a screenshot of the freebie if it’s a pdf or show how it looks on your laptop – so that your ideal students can see what they’re getting.
Then make a big effort to promote your freebie. The worst thing you can do is spend days researching a topic and actually creating the freebie, and then not spend enough time promoting it!
Share your freebie in the following ways:
- Standalone posts across your social media accounts
- In your social media profile bios
- To your existing email subscriber and ask them to share it
- Pinterest and link back to your website, preferably to a blog post that also promotes your freebie
- In your blog posts
- Yoga specific Facebook groups
- Create images for your website footer and sidebar
- In your email signature
- Guest posts on other websites
- In online forums that your ideal students hang out
STEP 6: ANALYSE & REPEAT!
Make sure you keep track of the success of your freebie. How many people have signed up for it and how many people have actually downloaded the freebie.
Ask your email subscribers if it’s been useful and get their feedback. And use this to develop more freebies and improve the ones that you currently have.
You could even go as far as testing a number of different freebies across your website to see which ones attract the newest subscribers to your list.
